Gather Layer 1 Staking Guide
Posted by admin on June 6, 2022
In this article, we cover all you need to know for staking in Gather Layer 1.
Requirements: Metamask Wallet, connected to Gather Network, with GTH coins.
If you already have a Metamask wallet, proceed to step 3.
If you already have a Metamask wallet, connected to Gather Layer 1, with GTH coins in it, please proceed to step 7.
1) Download “Metamask” Extension for your browser (Under the Chrome menu > More Tools > Extensions then search for “Metamask”)
2) While you are creating your wallet, save your “seed phrase” not on pc (for security purposes) but on paper and keep this in a very safe space. If you lose this phrase, you won’t be able to access this wallet from another pc later or if your computer is formatted. You will also be asked to create a password separately to open this wallet easily on your pc.
3) Once you open it, click on the “Ethereum Network” text at the top to open this network dropdown menu, select “Add Network” to add Gather Layer 1, and fill out these details:
Network Name: Gather Mainnet
New RPC URL: https://mainnet.gather.network
Chain ID: 192837465
Symbol: GTH
Block Explorer URL: https://explorer.gather.network/
4) Then select “Gather Network” from this network dropdown menu, and click on the wallet address (you see it just under the network menu) to copy as needed.
5) If you already own GTH tokens on Ethereum (as an ERC20 token) or on Binance Smart Chain (as a BEP20 token), go to https://bridge.gather.network to swap your tokens to Gather Layer 1. Select “from” which network you want to transfer your tokens to Gather Layer 1 then follow the steps accordingly.
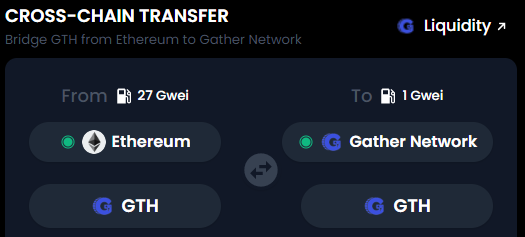
Example: Swapping GTH ERC20 token to GTH coin on Gather Layer 1
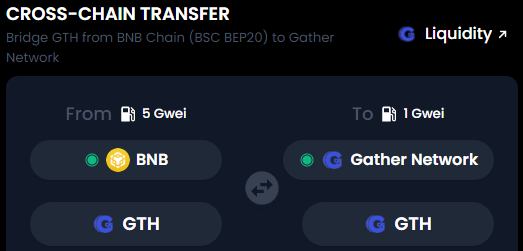
Example: Swapping GTH BEP20 token to GTH coin on Gather Layer 1
6) If you do not own any GTH, alternatively you can visit Ascendex to buy and transfer native GTH coins on Gather Layer 1: https://ascendex.com/en/cashtrade-spottrading/usdt/gth
Make sure you select “Gather” as the withdrawal network to withdraw your coins to Gather Layer 1 after buying GTH and add your Metamask wallet address/amount to withdraw accordingly:
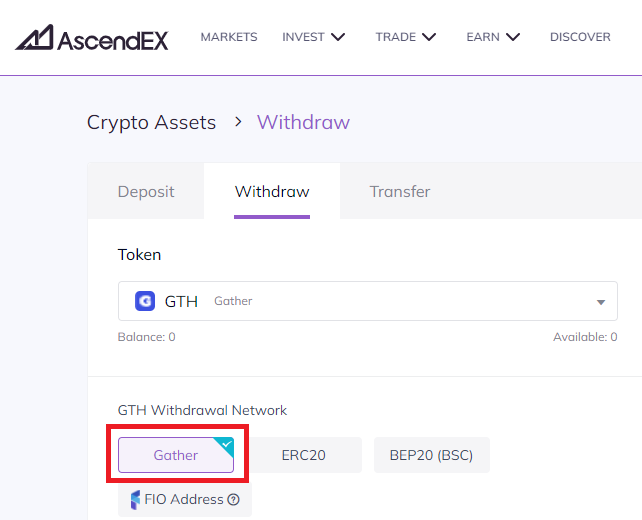
Selecting Gather Layer 1 during Ascendex withdrawals
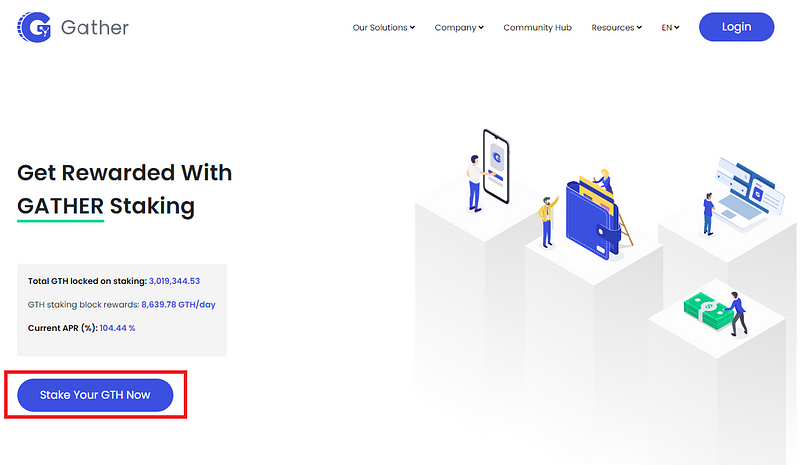
7) Once you have your GTH coins in your Metamask wallet, navigate to https://staking.gather.network/ and click on “Stake Your GTH Now” button to connect your Metamask wallet to authorize Gather Layer 1 staking.
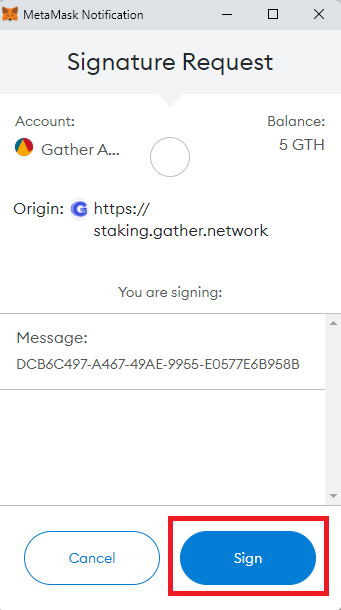
Authorizing Metamask to use Gather Layer 1 staking
8) After a successful connection, you will land on the Staking Portal, where you can see your wallet balance, click on the “Stake GTH Now” button, this will open a dialogue for you to enter the GTH amount you want to stake
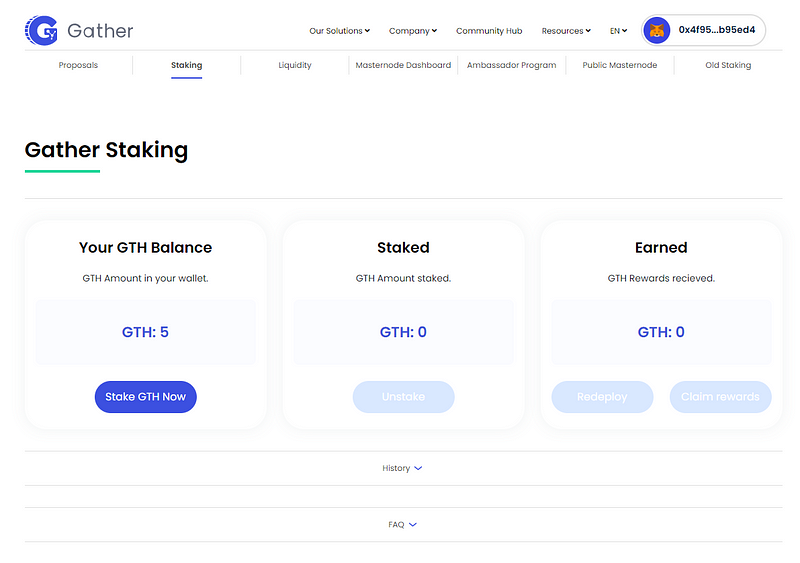
Staking portal — initial state
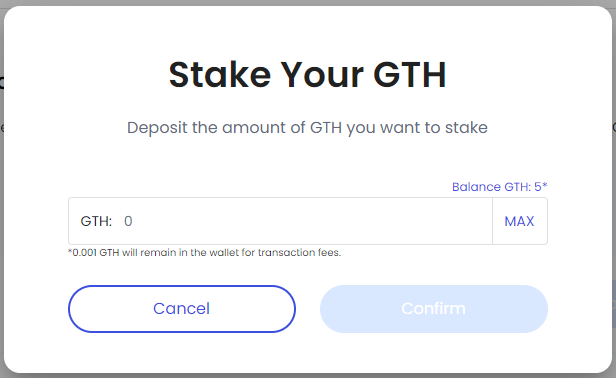
Dialogue to enter the GTH amount to stake
9) Clicking on the “Max” button on this dialogue will auto-write the maximum amount that you can stake. To claim or redeploy rewards later, the platform will always keep 0.001 GTH in the wallet. Alternatively, you can write the amount you want to stake manually.
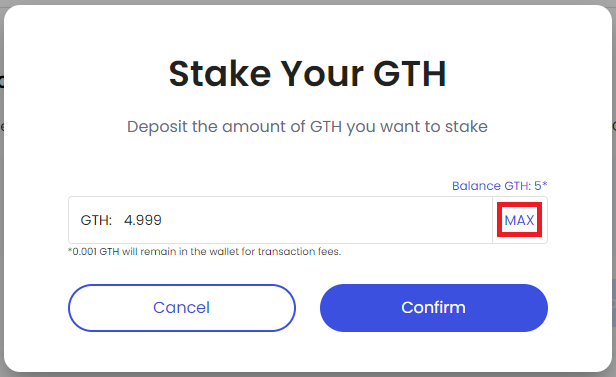
“Max“ button in action — Wallet with 5 GTH balance
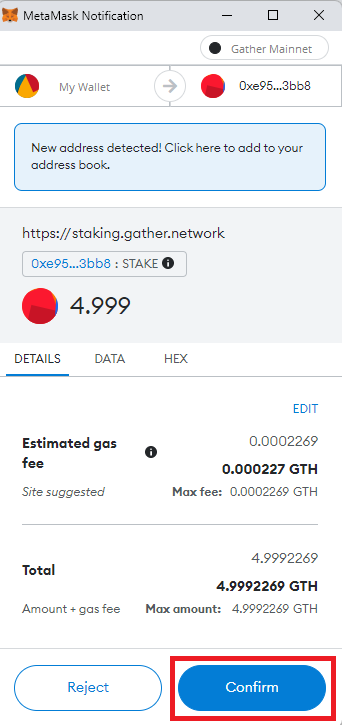
10) Click on the confirm button to start staking, and confirm the transaction on Metamask after

11) When the transaction is confirmed, you will see a success message on the right corner of the screen, your staked GTH will be visible in the middle of the page, and your earned GTH amount will update overtime on the right side of the page
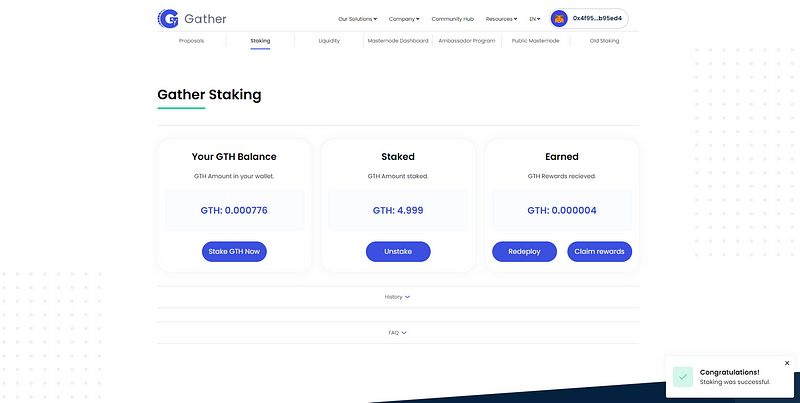
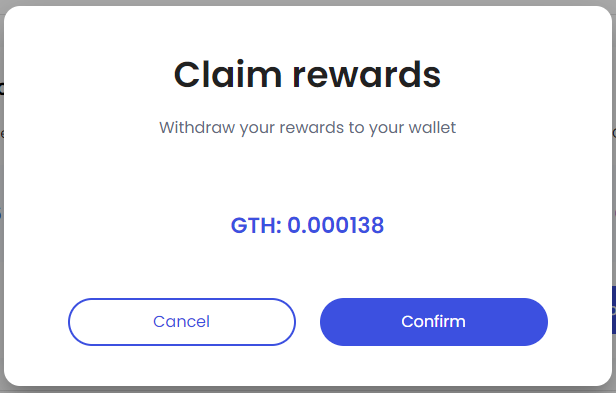
12) To claim your staking rewards, use the “Claim Rewards” button under the “Earned” section of the platform
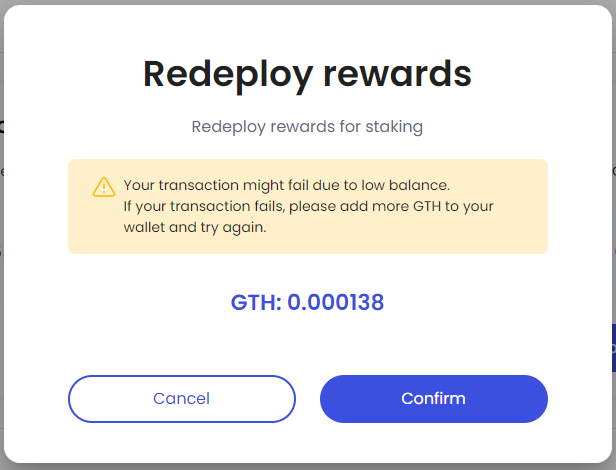
13) Alternatively you can redeploy your rewards to your staking balance by using the “Redeploy” button under the “Earned” section of the platform. Kindly note if you do not have enough GTH on your wallet to cover gas fees, you might not be able to initiate transactions.
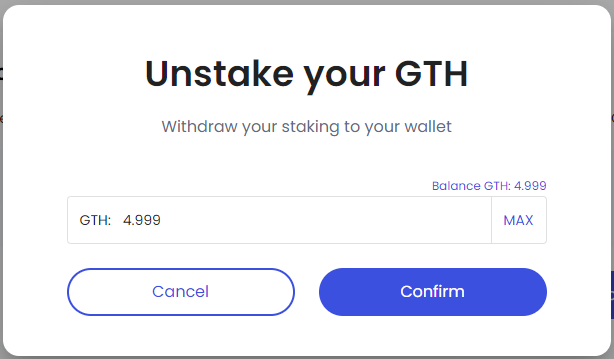
14) If you want to stop staking, you can use the “Unstake” button under the “Staked” section of the platform. Use the “Max” button or enter an amount to unstake as needed
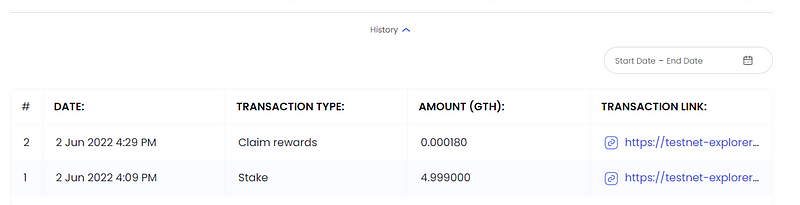
15) You can follow your activities under the “History” section if you like
Happy Staking!